Batch Edit Menu Items
Who this is for
Owners and admins who need to change prices, availability, printer or KDS routing, or shared item details for multiple menu items.
Before you start
- Select the correct brand. You need editing access for the full brand.
- Prepare the new values and the list of items and shops to change.
- Confirm the intended scope with the owner or admin before changing live prices or kitchen routing.
Open this page
- Open
Menu Management→Menu Items. - Filter the list by category, item type, or search term if you want a narrower starting scope.
- Select
Batch edit. The editor opens with those filters.
What this page controls
| Mode | Use it to change | Scope |
|---|---|---|
Shop item details | Regular prices, takeaway surcharges, availability, or printer and KDS destinations | The shops you choose |
Brand item details | Item codes, names, categories, button styles, and other shared settings | The shared item record across the brand |
You can stage changes to several fields. Review and apply each mode separately.
Steps
Set the scope and edit cells
- Select
Shop item detailsorBrand item details. - Open
Categoriesif you need to change the category filter. - Select the categories you want. Search by category or parent name. Use the
Subcategorylabel and parent path to distinguish categories with the same name. - Select
Apply selection. - In shop mode, open
Shop columns. HQ shows up to five enabled shops to start. Choose the shops you want, then selectApply selection. - Choose a
Fieldin shop mode or aField groupin brand mode. - Edit the cells you want to change. For example, enter a different price for each item under its shop column. HQ stages each edit as you make it.
Use Rows per page to show up to 500 items on a page. If you want to fill only certain rows, turn on Select items and tick those rows. The header checkbox selects the current page. Use Select all {count} filtered items to select matches across pages.
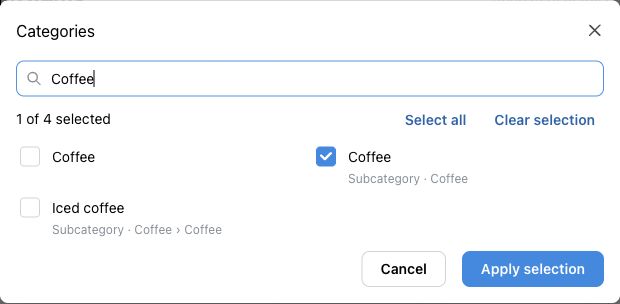
Both entries are named Coffee. The checked entry shows its parent under the name.
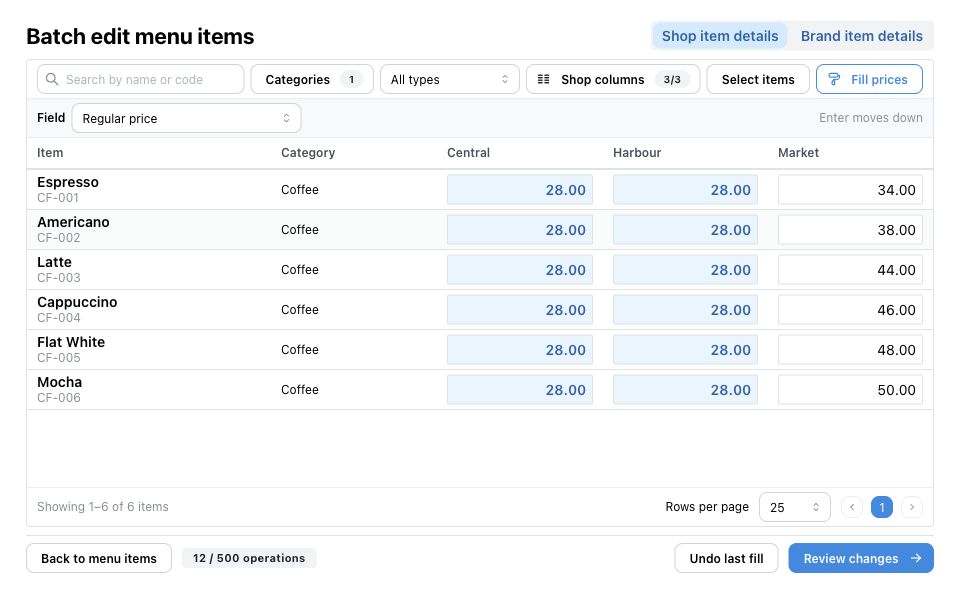
The blue cells show staged prices. The Market column keeps its original prices.
Fill the same value across items
- Open the fill action. For example, select
Fill pricesforRegular priceorFind and replace / fillfor brand details. - Choose the item scope.
This pagecovers the current page,All filtered itemscovers matches across pages, andSelected itemscovers the rows you ticked, including any outside the current filters. - In shop mode, check
Target shops. The fill starts with the shops inShop columns. Narrow the list here if needed. - Enter the value to fill. For a brand text field, you can also choose
Find and replaceto change matching text. - Check the projected number of cells and operations.
- Select
Stage changes.
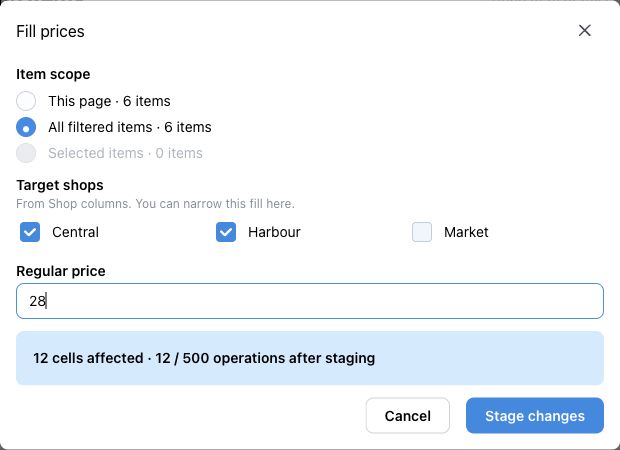
This fill stages a price of 28 for six items at each of the two selected shops, for a total of 12 changes.
For kitchen routing, select the printer or KDS slot under Field, then select Fill printer / KDS. Enter a name in Match a destination by name to get an exact match for each shop and device type. Check each shop's destination. If several devices share a name, use the device ID shown in the list to pick the right one. Choose a destination manually or select Skip this shop if there is no match.
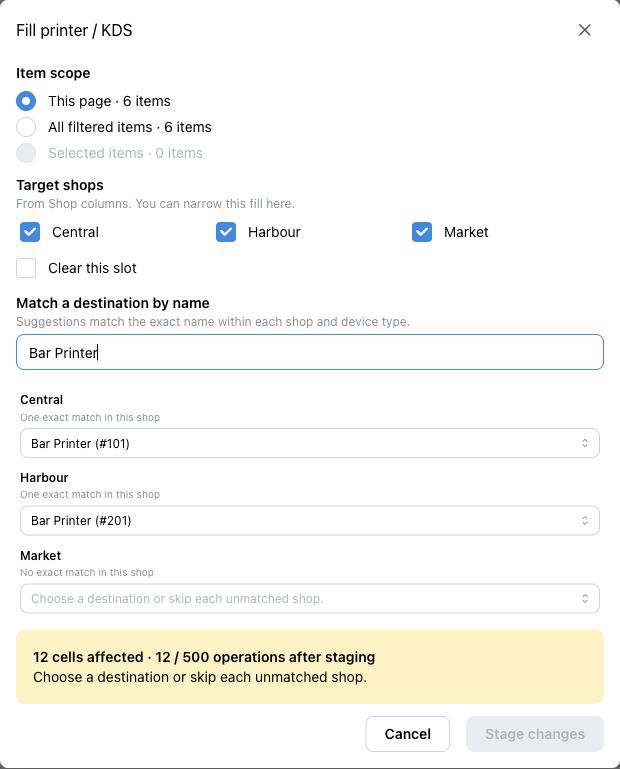
Central and Harbour match the same printer name to different devices. Market needs a destination or must be skipped.
Review and apply
- Check the operation count in the grid. Each job can apply up to 500 operations. A single row can have edits for several shops, so use the operation count to check the limit.
- Select
Review changes, or selectReview first {count}if the draft exceeds the limit. HQ keeps the remaining edits staged for later jobs. - Compare the current and proposed values for every affected item and shop. Searching for a shop in the review only changes what you see. Applying still covers the full scope shown in the review.
- If anything is wrong, select
Back to gridand correct the edits. UseUndo last fillif the latest fill used the wrong scope. Changing a filter can hide staged edits, so check for draft edits outside the current view before reviewing again. - Select
I reviewed the changes for the full scopeif HQ asks for confirmation. - Select
Apply {count} changes. - Review and apply any remaining jobs.
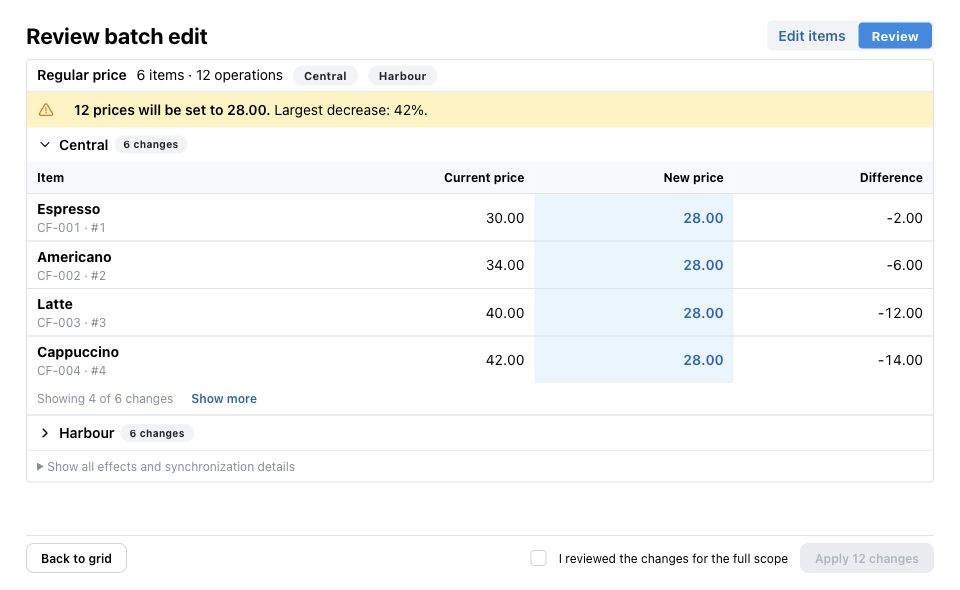
Check the affected shops and compare the current and new prices before confirming the job.
What changes after you save
HQ saves the reviewed changes for the job you applied. Shop settings apply to the affected shops. Brand settings change the shared item record. The editor shows how many operations were applied and how many remain in the draft.
How to check your change
- Reopen the affected items in Menu Items and check the saved values.
- Check the correct shop for prices, availability, or routing.
- Test an affected item at a target POS when the change affects checkout or kitchen output.
If something goes wrong
- If HQ says the menu changed after review, select
Reloadwhen offered and review the latest values before applying. - If review is blocked by invalid cells, return to the grid and correct the flagged values. If a target is no longer available, review the warning before using
Remove unavailable edits. - If you need to start over before applying, return to Menu Items and confirm
Discard draftwhen prompted.
When to ask owner/admin
Ask for help if you cannot open Batch Edit, cannot confirm the intended shop or device, or are unsure about changes that affect live pricing or kitchen routing.
See Menu & Catalog Overview for other catalog tasks.